
You can now pay your GISNET internet bill from your phone in minutes. No need to come to the office, no need to send a photo of your transfer receipt, and no need to wait for the admin to check bank statements. As soon as the payment succeeds, your bill is automatically marked as Sudah Bayar (paid).
Here are the complete steps, with pictures from the payment page. The images in this article use a sample customer account, so the name and amount on your screen will reflect your own bill.
Before You Start: Where Do You Get the Bill Link?
There are two ways to open the bill page:
- From the bill message via WhatsApp sent by GISNET. The message contains a link like pay.gis.net.id/invoice-number.
- From the Customer Portal at my.gis.net.id: open the Tagihan (Bills) menu, then tap the Bayar sekarang (Pay now) button.
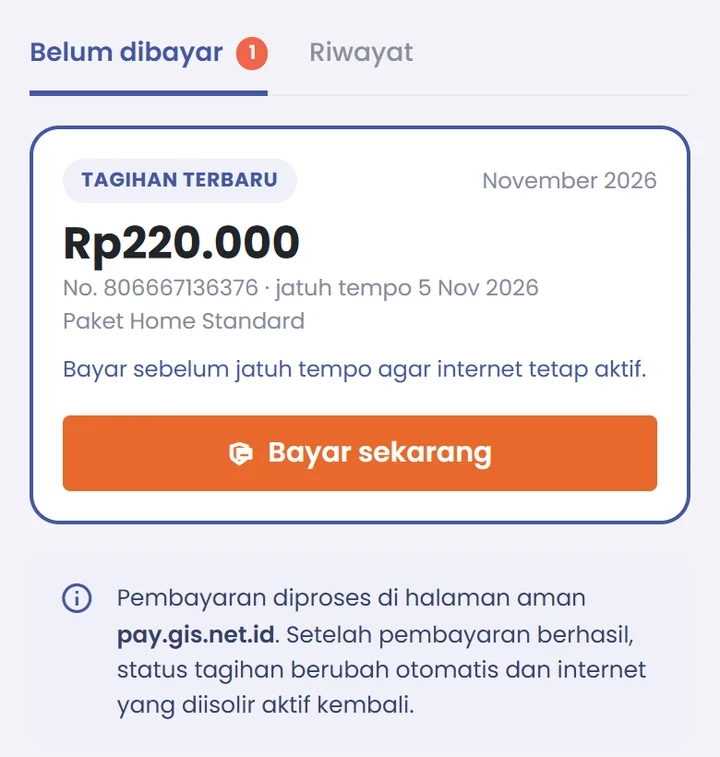
You can also open pay.gis.net.id directly, then enter your Customer ID to look up your bill.
Step 1: Check the Bill Details
The bill page shows the invoice number, due date, internet plan, and total amount due. For security, the customer's name and phone number are partially masked. In the Pilih Metode Pembayaran (Choose Payment Method) section, you can see the total online payment, including any service fee, before you pay. If everything is correct, tap Bayar Online (Pay Online).
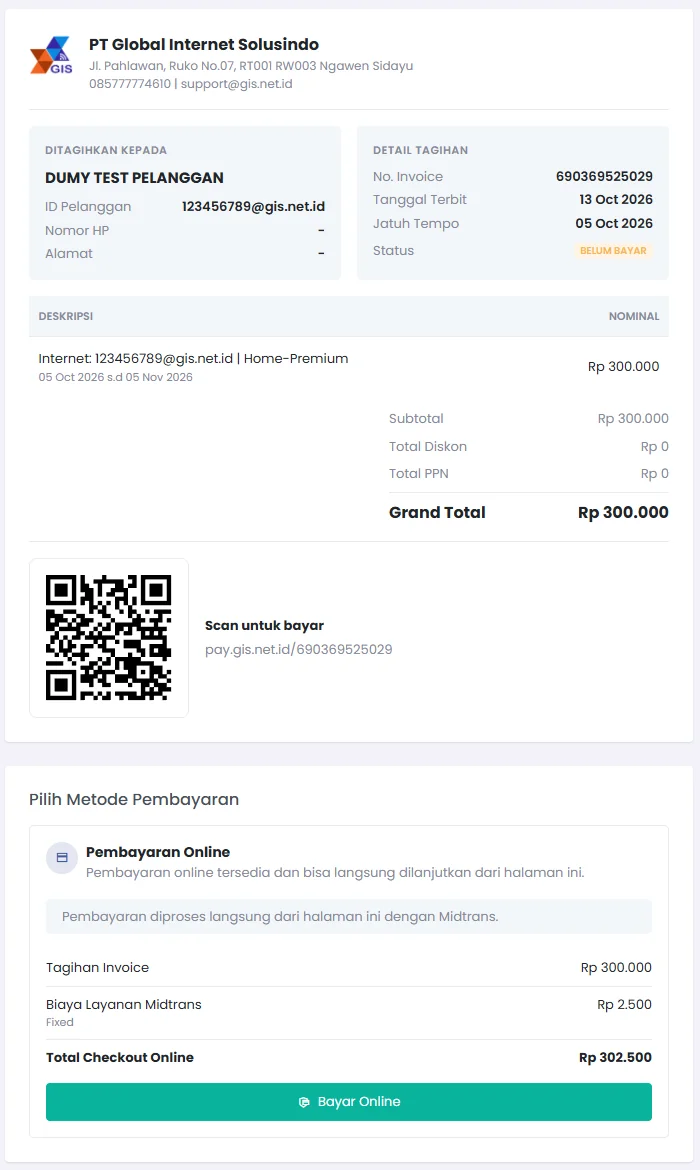
Step 2: Choose a Payment Method
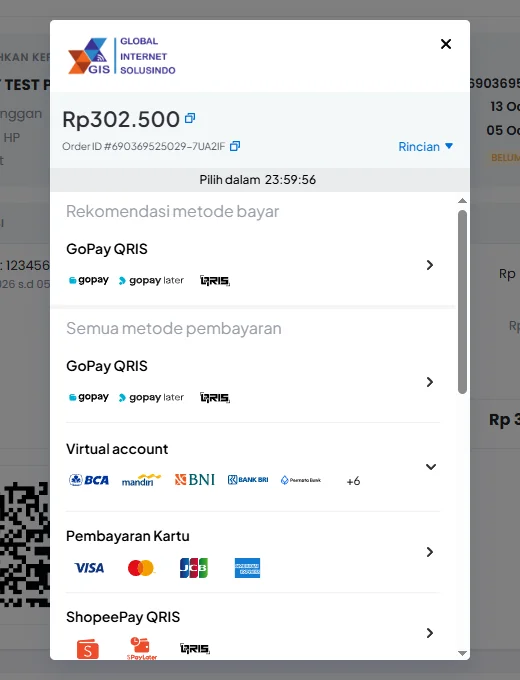
The official Midtrans payment window will open. Choose the method that's easiest for you:
- QRIS / GoPay / ShopeePay: scan the QR code or pay directly from your e-wallet app.
- Virtual Account: BCA, Mandiri, BNI, BRI, Permata, CIMB Niaga, and other banks.
- Debit/credit card: Visa, Mastercard, JCB, and AMEX.
- Other methods shown on screen (if any).
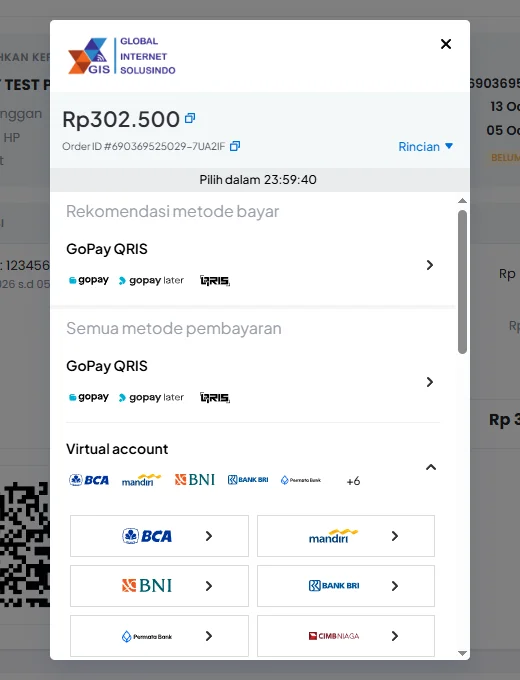
Step 3: Choose a Bank (If Using Virtual Account)
For example, tap Virtual Account, then choose the bank where you have an account.
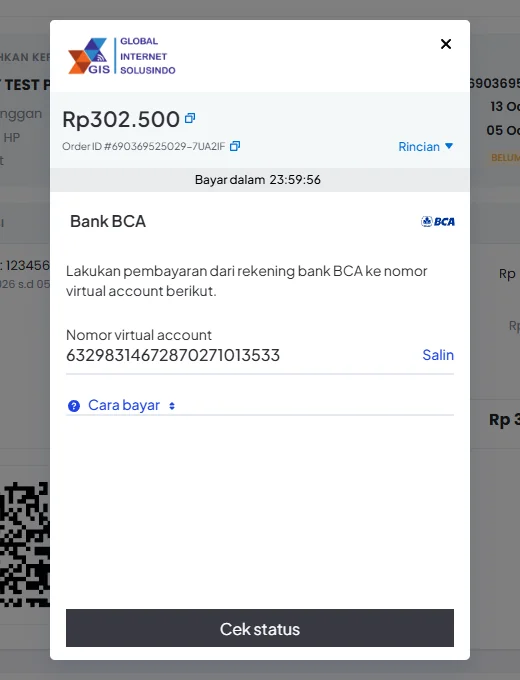
Step 4: Transfer to the Virtual Account Number
A Virtual Account number specifically for your bill will appear. Tap Salin (Copy), then transfer the exact amount shown via mobile banking, internet banking, or ATM. Full instructions are in the Cara bayar (How to pay) section. Note the payment deadline at the top of the screen.
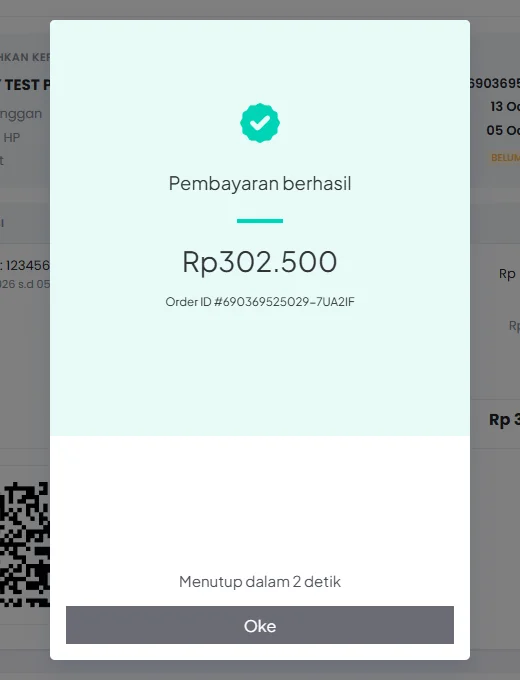
Step 5: Payment Successful
Once the transfer is received, a Pembayaran berhasil (Payment successful) screen appears in the same window. If you paid from another app and this window is still open, tap Cek status (Check status).
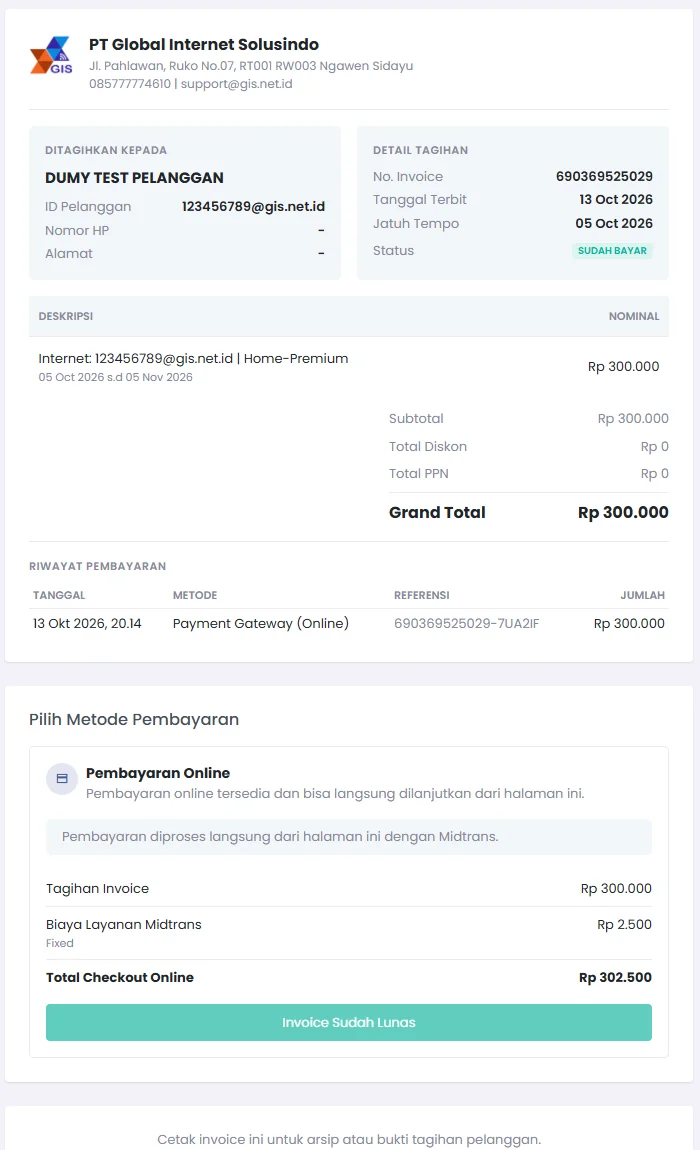
Step 6: The Bill Is Automatically Marked as Paid
The GISNET system receives confirmation from Midtrans automatically. The bill status changes to Sudah Bayar (Paid), and your payment is recorded in the Riwayat Pembayaran (Payment History) section. If your service was isolated due to late payment, the internet will be reactivated automatically once the payment is recorded.
Tips for a Smooth Payment
- Pay before the due date so your internet isn't isolated.
- Transfer the exact amount shown on the Virtual Account screen.
- Make sure the address is pay.gis.net.id or my.gis.net.id. GISNET never asks for payment to a personal account or through any link other than these two.
- Prefer to pay by regular transfer? If available, GISNET's official bank account is listed on the bill page. After transferring, send proof of payment to our admin via WhatsApp at 0857-0629-9235. Regular transfers are confirmed manually by the admin, so the paid status and service restoration are not instant.
Need Help?
If you have trouble paying, contact the GISNET support team via WhatsApp at 0857-0629-9235. Other guides about customer accounts are available on the Customer Area page and in the article Manage Your Own Internet through the Customer Portal.
Not a subscriber yet? Enjoy GISNET fiber internet that is unlimited with no FUP, with upload as fast as download and full IPv6. See our plans or check the coverage area.